Auto match a bank statement
Once a statement has been uploaded the transactions
in the statement need to be allocated to the correct account. The auto match function will automatically match transactions to the correct accounts where
possible, based on the auto matching rules setup for the bank, e.g. transactions that have been sent to the bank via DD (Direct Debit) and DC (Direct Credit) files and appear on the bank statement with the correct reference numbers.
Transactions that cannot be auto matched based on the rule defined will need to be manually identified and
matched to the correct accounts. Keep in mind that auto matching rules can be added to and changed at any time in order to increase the number of transactions that are auto matched.
1. Log into Clearmatch Fusion with the relevant credentials:
2. From the main menu select Banking > Bank Statements:
NOTE: in order to successfully auto match a bank statement, it needs to be imported into Clearmatch first. To find out how to do this follow the full instructions provided in the Uploading, Viewing and Uploading a Bank Statement article.
3. The bank statements screen will appear blank and show no available options. Simply select the warehousing entity that the bank account belongs to from the Warehousing Entity drop down list:

4. Click on the Bank Uploads option under List (on the Bank Statements screen):

5. The bank statements will be ordered by the date and time that it was uploaded so the most recent will show at the very top. Find the bank statement in question and select it:

6. On the association tab at the bottom of the page, ensure that the Bank Statements option is selected (from the drop down list or quick link if enabled), and select the link to the Statement Date:
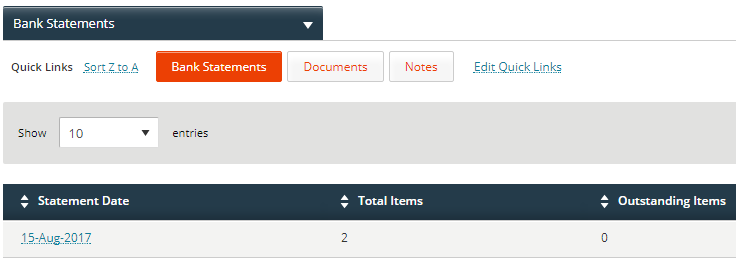
7. If there are any bank statement transactions that have not been matched, they will appear in the "Unallocated Items" tab at the bottom of the page:
8. To auto match and allocate these items, select the Actions Panel  > Functions > Auto Match:
9. All items that can be auto matched will be moved to the "Allocated But Not Posted" tab for review. It is important that the items are checked before posting as once they are posted,
they will appear against the accounts:
NOTE! the following should never be auto matched:
- Finance agreements direct credit dishonours. Finance agreement direct credit dishonour transactions cannot be auto matched. The reason is that if matched to the finance agreement will make the balance zero and the account will settle. In these cases the transaction must be matched to a suspense account and then you will need to resolve the issue and do a bank transfer to get the funds to the borrower. Then once this manual payment comes through in the bank statement it will have to be matched to the same suspense account as the dishonour thus making the suspense account balance zero.
- Direct Credit Interbranch and Direct Debit interbranch transactions that dishonour. These are transactions where the money is transferred from the fund account to the asset class account to make money available to pay borrowers. If these transactions dishonour, no auto matching will take place. The dishonour transactions will need to be matched to a suspense account. You will need to determine why the funds dishonoured and do a manual bank transactions to get money into the asset class bank account. Then once this manual payment comes through in the bank statement it will have to be matched to the same suspense account as the dishonour thus making the suspense account balance zero.
Related Articles
Manually match a bank statement
At times there will be transactions that appear in the bank statement that do not meeting the auto matching rules and will need to be manually allocated to an account e.g. a customer deposits money into the bank account and does not put the finance ...Bank statements
The process to bank statement processing involves the following steps: Step 1 – Upload files Step 2 – Import files Step 3 – Auto matching transactions Step 4 – Manually matching items that did not auto match Step 6– Post the matched transactions Once ...Dishonour files from the bank
Not all banks detail dishonour transactions in the bank statements, example ANZ bank. This makes it impossible to process dishonoured transactions through the bank statement upload. ANZ bank have a separate file called a “return items” file that ...Post a bank statement
When transactions have been allocated and reviewed, it must be checked to ensure that all is correct before transactions can be posted. Once posted, the transaction(s) will be active and appear against the account that they have been allocated to. ...Uploading, viewing and importing a bank statement
Uploading a Bank Statement Statements from the bank will need to be uploaded into Clearmatch. Statements are uploaded to a bank account against a specific warehousing entity. 1. Log into Clearmatch Fusion with the appropriate credentials NOTE: A ...