Create an email template
This document will be outlining the steps on how to create an email template. Email templates need to be created first in order for emails to be sent out. The content in the template is what the customer will receive.
Here is a video that shows you how to perform the below actions.
1. In Clearmatch to create an Email template, navigate to Home Pages > Notification Management:

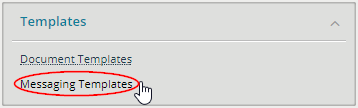
2. Select the Messaging Templates option under Templates:
3. Use the Filter Options to find the templates based on the Finance Company and Originator Group and press the  button .

4. Review all of the email templates by looking at the the Content Type heading on the far right (to differentiate between Email and SMS):

The purpose of viewing the templates before creating a brand new one, is to ensure that an email template has not already been created (to avoid duplicates).
5. To create a new template click on the cross/plus icon in the top right-hand corner 
6. Supply the details prompted for on the page
Finance Company from the drop down list, that this template will be associated with:
Originator Group from the drop down list (usually based on the Finance Company and may automatically select one as a default):
Select the Email option under the Content Type drop down list:
Description field which will outline what the email template is/will be used for:
Sender field allows you to add the name that will appear as the sender when the email is received by the customer.
Subject field allows you to add a subject heading for the email.
Priority of the email as to the level of urgency for the email to be sent NOTE: 5 is Low, 4 and 3 is Medium, 2 and 1 is High . Higher priority email will attempt to be sent first when the email service as multiple emails to send out
In Active option is a checkbox that will if enabled, make the template inactive (as it cannot be removed):
Template Content: what the user will receive as a message sent to their email address. There is a formatting toolbar that will allow you to customise the template and add images, bullet points, different fonts, colours, etc:
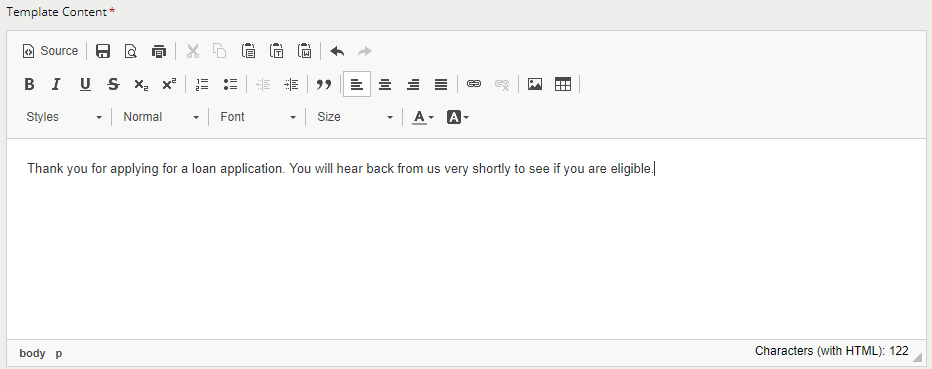
Inside Template Content you are able to,
- Enter display variables which are placeholders for data points that will be replaced at the time the email is generated. For an example: if an email need to be sent to a personal customer with customer name appear at the top of the email , Example : Hi John, then it is required to find the correct display variable and added inside template content. steps on how to find display variables is mentioned in this link. After retrieving the display variable, then it can be added with a prefix of [[ and a suffix of ]] inside template content as follows . Similar to the example below, other existing display variables also can be used in the same way after retrieving them from the correct place.
NOTE : It is important to make sure that the correct display/ document variables are used. As an example, an email template linked to "personal customer" can only use display variables available to a personal customer. An email template linked to "an application" can only use display variables available to an application.
- Enter custom content blocks. More details about custom content blocks and steps on how to create custom content blocks are mentioned in this link. In order to add a custom content block inside Template Content, click on
icon inside the Template Content. Custom content blocks included will be prefixed with [{ and suffixed with }]
Then a popup will appear with existing custom content blocks. Select the correct custom block from the drop down and click on  to add the custom block inside the email template.
- Any URL that the finance company would like to have shortened on delivery of the message will need to be surrounded with the tags {{ }}. Example {{www.Clearmatch .com}}. this option can only be used if an account has been created at a service provider that performs URL shortening that Clearmatch integrates with and the credentials supplied to Clearmatch
7. Once completed, to save the email template, simply click on the  button but if for any reason, you would like to exit out of this, click on the
  button.
Related Articles
Create a SMS template
This article will be outlining the steps on how to create a SMS template. SMS templates need to be created first in order for SMS messages to be sent out. The content in the template is what the customer will receive. 1. Login to Clearmatch Fusion ...Create an email - personal customer
Finance company users can send emails to customers directly from within a customer record within Clearmatch Fusion. The email will be sent using the available email templates based on the email configurations defined and the correct data points ...How to create a document template
Document templates are used as a way for customers to provide and obtain information about applications, finance agreements, listings, investments.. etc. Document templates can be defined at originator group level. Documents sent out are based on the ...Email templates
Email templates are used to define the layout, colours, logos, wording of emails that will be generated from within Clearmatch. Once email templates have been defined, they can be configured to be emailed manually or automatically from relevant ...Creating a template for notes to be sent via email or SMS
The content to be used for a note will be entered against the note category for each originator group. In order for a note to be sent, the template to use must be created first. This template can be setup as either an SMS message or email. 1. In ...