Create new system users i.e. for finance company users
In order to successfully use the Clearmatch Fusion system, credentials have to be created and configured accordingly. The system users are the staff and users at the finance company that are allowed to access the Fusion loan administration system.
1. Log into the system with your Username and Password:
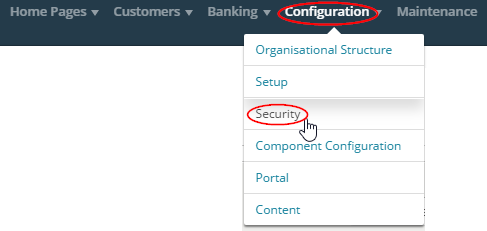
2. Navigate to Configuration > Security:
3. Select the Users option under User Maintenance:

4. Click on the  icon in the top right-hand corner to add a new user.
5. Fill in the relevant details of the user based on the list of available fields (which are all mandatory):
Finance Company – this is a drop down list of available finance companies that the user has access to and should default to the finance company that the user belongs to. The ownership group should be used to determine which finance companies should appear in this list.
Originator Group – this is also a drop down list of available originator groups that the user has access to and should also default to the originator group associated with the finance company above. The ownership group should also be used to determine which originator groups should appear in this list.
Originator – this is another drop down list of available originators for the originator group selected and should once again default to the originator associated with both the originator group and finance company above.
Customer – this is a customer search and the user will only be able to see the customers that belong to the same finance company selected. This must be created and configured beforehand and cannot be done while the user is being created.
Full Name – this is the full name of the system user.
Login – this is the login that the user will need to access the system and will be requested as the Username in Fusion.
Ownership Group – this is a drop-down list of available options for ownership groups NOTE: this has to be configured beforehand and the ownership group will determine the level of information that the user is able to see and access.
Clearance Level – this is a drop-down list of available options that will assign specific access to the system user NOTE: this also has to be configured beforehand and the clearance level will allow the user to complete certain functions within Fusion. For more details on security clearance levels refer to this article.
Authorisation Code – this is a code that is used when specific functions are required. This has a 10-character limit and should be created after the user has been created. For details on how to create this, please refer to this article.
Default Pane – this is a drop-down list of available options to select the first screen that the system user will see in Fusion when they log in. This is a home page menu that allows a user to have a certain menu open when they sign in.
Finally select the  button to continue and create the new user or the
  button to return to the List Users page.
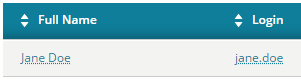
6. Once the system user has been created, select the person by clicking on the hyperlink via their Full Name or Login:
7. The password will need to be created for this person before they log in. See this article on how to reset a password:
8. The new system user will need to be added to a user group to grant permissions to access parts of Fusion: As outlined on this article.
9. User preferences can also be copied from another user. Tis is optional and can be viewed in this article
Related Articles
Create a personal customer in Clearmatch Fusion
In the platform, personal customers are 'people' . The reason why they are referred to as customers is to encourage all people to use the platform to borrow or invest. Customers are people, system users are people, staff members are people. So any ...Create a business customer in Clearmatch Fusion
A business customer is any business or organisation e.g. company, trust etc. All details specific to the business are stored against the business customer (with information like address, contacts, bank accounts, etc). When a business customer is ...Create membership security role - finance company level
This article outlines the steps on how to create membership security roles and assign permission(s) at finance company level. Membership security roles at finance company level are the roles that are available to be used for all borrowers, investors, ...System users - add an external login
Clearmatch allows other finance company users to login to system while using their own company authentications for the purpose of authenticating users into the Clearmatch applications. As a result they will not need to have a separate login ...Importing users
An import option exists on the system users, which will allow a finance company to import all their users into Clearmatch. The following details related to a user can be imported into the platform using a CSV file format. Provider : External ...